


11 Jan Wedding Wednesdays: How to save those flowers!


Happy Wednesday!
Oh, and what a happy Wednesday it is! For this edition of Wedding Wednesdays, I wanted to partly celebrate a very special occasion: My best, best friend in the whole world got engaged! For her birthday this week, her new *fiancé* took her to Disneyland and popped the question right then and there!
When Bryce proposed, I couldn’t imagine how much love and happiness awaited us. Our sweet friends and family showered us in love, and ever since, I’ve wanted to freeze all of these special moments in time.
The week we got back to the office after the proposal, my mom sent us the most amazing bouquet of long-stemmed red roses. They were absolutely stunning, and they filled the entire office with the most gorgeous smell. This bouquet was SO big that it almost covered my entire desk! I felt SO special!
If you know me, you’ll know that I adore flowers. In fact, for the two months leading up to Bryce proposing, he had a fresh bouquet delivered every week! But here’s the thing about flowers: they don’t last forever.
So, what’s one to do with those gorgeous blooms? There are plenty of ways to preserve bouquets, but I wanted to try my hand at a little DIY:

Monogram art! Clean, classy and always in style. *Sassy girl emoji!* This was a super simple project that didn’t take much time at all!
Materials you’ll need:
Your gorgeous blooms of choice, just beginning to wilt
A hair tie or rubber band
Piece of wood or canvas (mine was about 12 inches tall by 18 inches wide,
but you could go smaller or bigger.)
Plastic Baggy
Rolling Pin or Hard-walled Bottle
Pencil
Clear Elmer’s Glue & Spongy Pen
Spray Sealant
Execution
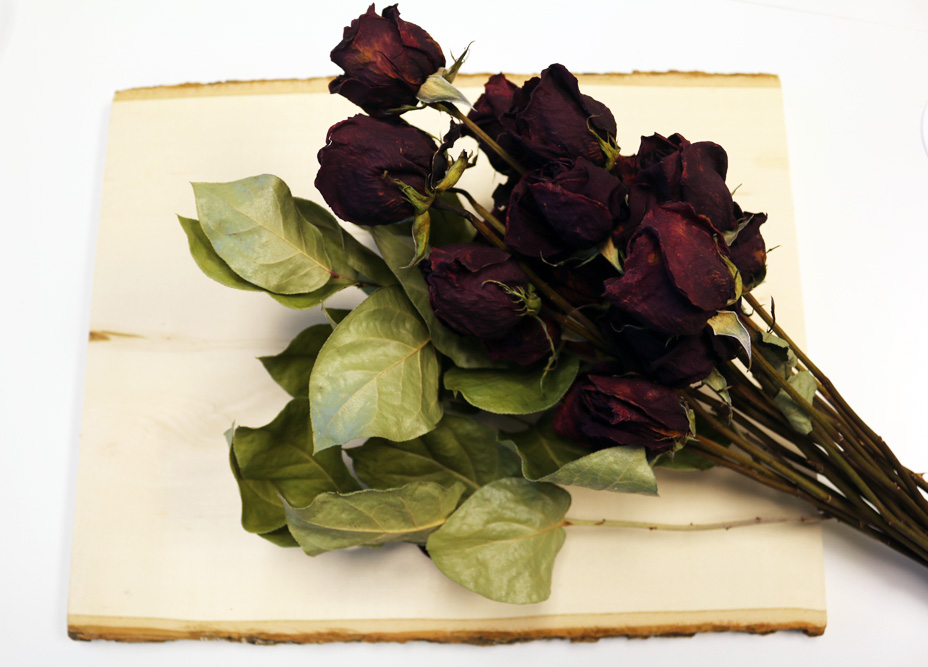
Step One: Dry your flowers.

Once your flowers begin to wilt, it’s time to dry them. Don’t wait too long to hang these after they begin to wilt, as they also begin lose shape quickly. Preserve those gorgeous blooms by tying the bunch around the stems, and hang them up in a dark dry place (like a closet!). Check every few days for dryness levels. You’ll want the petals to be nice and crispy! For me, this is about 7-10 days after they begin to wilt.
Step Two: Crunch and crush!

You’ll need to break down your petals into a manageable size to adhere to your board. Break off the buds and discard the stems. Place the buds into a plastic baggy and seal, squeezing as much air out as possible. Take a rolling pin, hard water bottle, or something else that’s strong and rolly, and roll back and forth over the petals to crush. You don’t want too fine of a powder, leave some larger pieces for texture:

Step Three: Trace your monogram.
Grab your board! I got this great piece of wood from Hobby Lobby, and it was unfinished and still had bark on the edges. You could also use a pretty piece of canvas and paint in a color of your choice before this step, but for this example, let’s stick to a wood board.

Trace out your monogram with a pencil, being as light as possible against the grain. I wanted to do an “XO”, but you could use your initials or a special date, too!
Step Four: Adhere your petals!
Petal time! Take your clear Elmer’s Glue, and squeeze a good amount in sections. For me, I did about three-inch sections at a time. I fully coated each space with glue using a spongy pen, then took a heavy pinch of flowers and pressed it into the glue. Be sure not to leave any empty spaces!

Step Five: Seal. You’re done!
There’s a few different ways you can finish this off. You could take a spray sealer from Hobby Lobby and do a good coat over the face of your new art piece, just to keep all the petals in place. If I’m being totally honest, I just left it as is! It looks great and the petals are nice and stuck.

That’s it! You’re now a proud DIY’er with a pretty piece of art to show for it. And, better yet, you get to showcase your beautiful flowers and always remember the special time you received them.
No Comments